At some point, all of us computer users have experienced the pain, frustration and anxiety of losing some amount of work due to an application that has “unexpectedly quit”. Losing your work to a system error needs to only happen once before one becomes more vigilant about saving work or creating a backup. When creating apps in App Inventor, it is easy to forget to “save” because the platform does it for you (every 5-30 seconds). In theory, there is no need to save a project that is already being saved. But, in reality, I would recommend to save, save, save.
Given that advice, what are the App Inventor saving options?
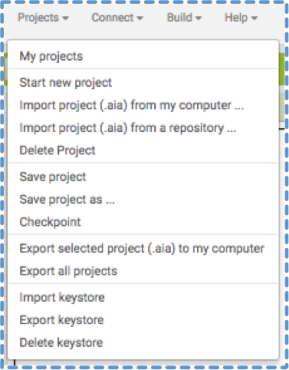
You can save projects in App inventor and to your computer. All of the options are under the Projects Menu (in both the Designer and Blocks Editor). You will find Save project, Save project as… and Checkpoint along with Export selected project (.aia) to my computer and Export all projects.
 Save project is the manual version of the automatic save feature. It merely reassures you that your project is saved and you continue working in the same version of your project. Use Save project for peace of mind.
Save project as… works similarly to a Save As in Microsoft Word. It allows you to save the project with a different name and afterwards, begin working in the new version of the project. Your previous version is saved in My Projects. Use Save project as… for peace of mind.
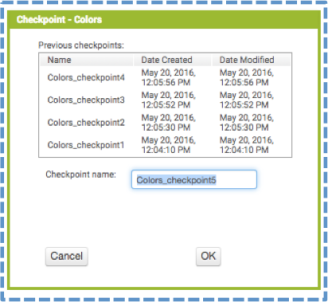
Checkpoint also makes a copy of your current project, but allows you to keep working in the original project. Creating a Checkpoint, essentially takes a snapshot of your project at a point in its development and saves it in My Projects. You may want to create many Checkpoints along the course of building your app as it grows in complexity. For example, if you create a Checkpoint before you add a database then encounter a problem or a bug that you are not sure how to fix, you can always re-open the Checkpoint that did not contain the database and start anew.
When you create a new Checkpoint, App Inventor shows you a list of previous Checkpoints and the time/date they were saved. 
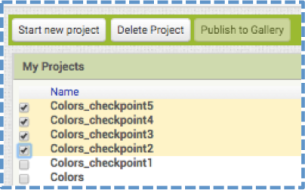
Once you have completed your app, you always have the option to delete or keep your Checkpoints. Use Checkpoint for peace of mind.

In addition to saving your projects within the App Inventor platform, you can also export your projects.
Export selected project (.aia) to my computer is a feature I cannot recommend enough. It’s easy, easy, easy to save an .aia file to a location on your computer and/or to an online storage system like Google Docs or Dropbox. And if you ever need to open that .aia file, just select Import project (.aia) from my computer… to bring it into your projects list in App Inventor. Use Export selected project (.aia) to my computer for peace of mind.
Tip of the day: For complete peace of mind, save your work within App Inventor and export your work to your computer.
Filed under: how to | Tagged: checkpoint, export, Save | 1 Comment »


 user-friendly (and pleasing) interface is as important as creating code that functions properly. Many App Inventor users assume that all UI features are found in the Designer. However, this is not the case in terms of colors. Over and over, I hear people reveal their frustration about the limited amount of colors available in App Inventor. At first glance, the Designer does seem to only offer a list of 8 saturated colors, along with white, black and a few grays. But really there are a multitude of color options if you know where to look. All you need to do is head over to the Blocks Editor.

 When your app launches or when you make a change in the Designer, the components will receive their newly hued instructions and your previously boring grey buttons will come to life!


